Powering our expensive components has always been something we put off to the end, because if it’s not done properly you’re likely to blow something up.
Fortunately, we have a fire extinguisher right outside our office, so we can begin to put some thought into the power supply.
Today, Matthew and Riley were discussing how they would have to move the I/O shield so that the NUC’s power cable didn’t obstruct the wheels while in use (as shown below).
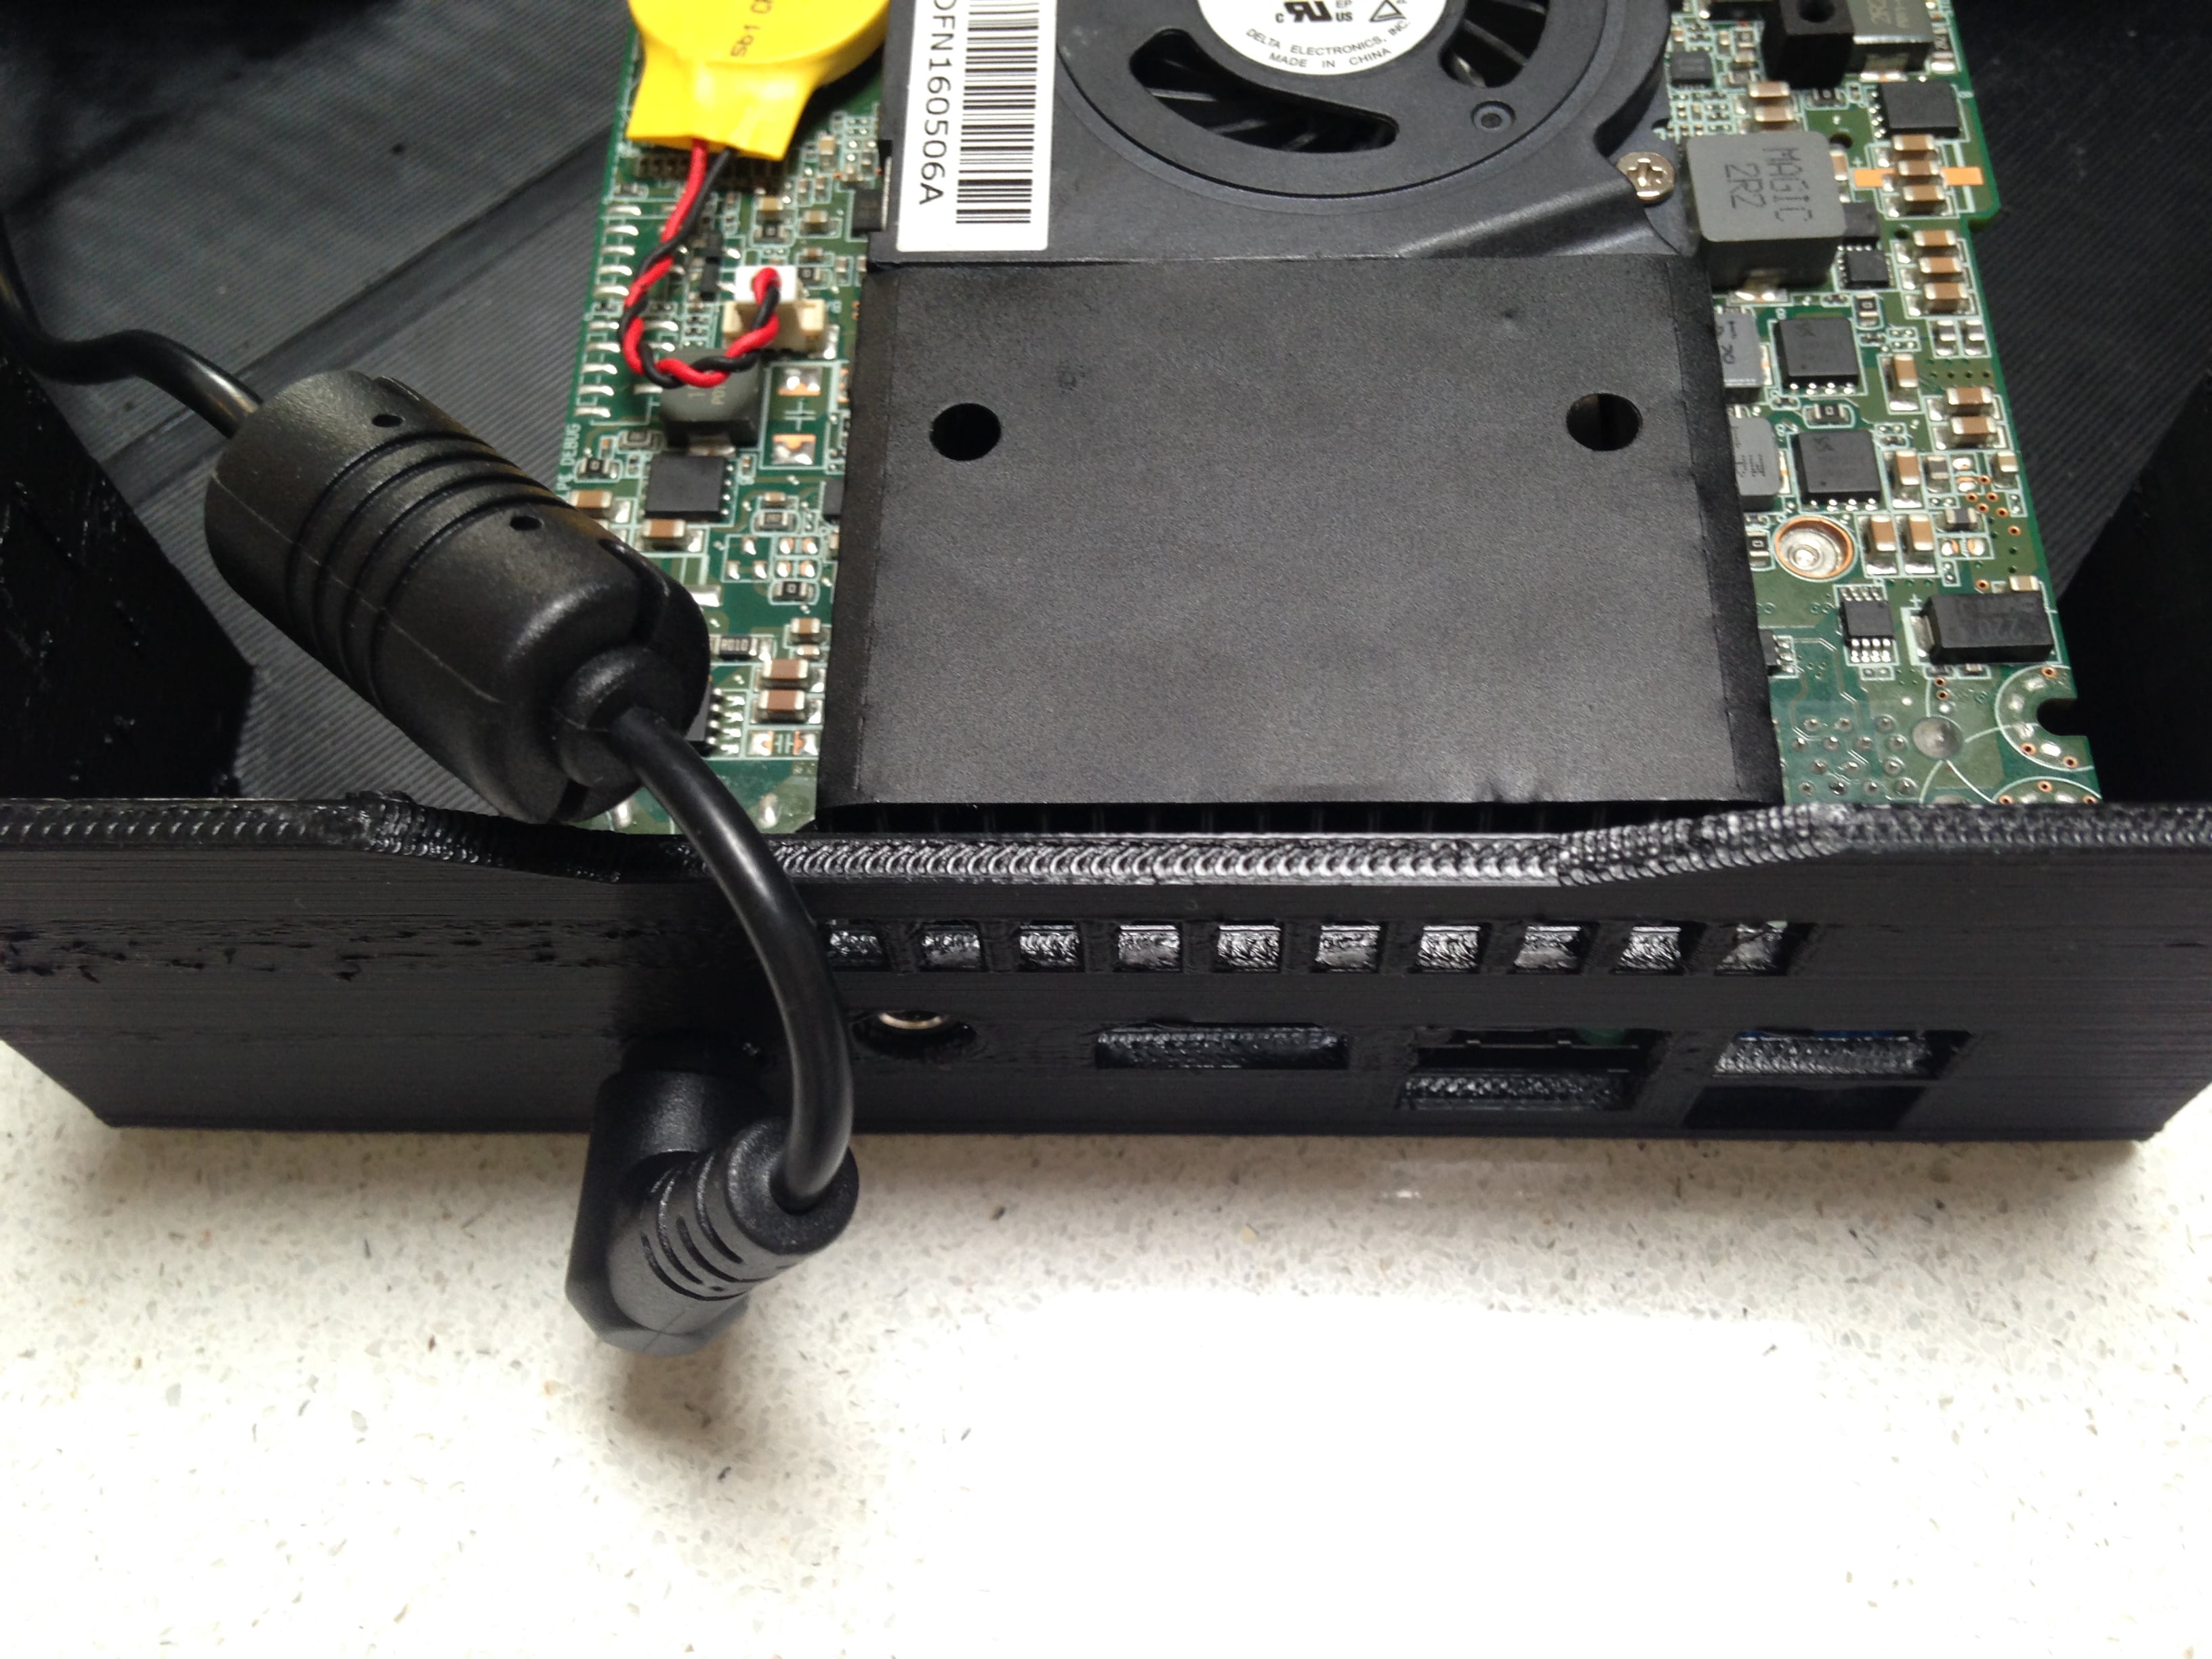
I thought there had to be a much more elegant way of supplying power without having a loop of cable hanging outside the robot.
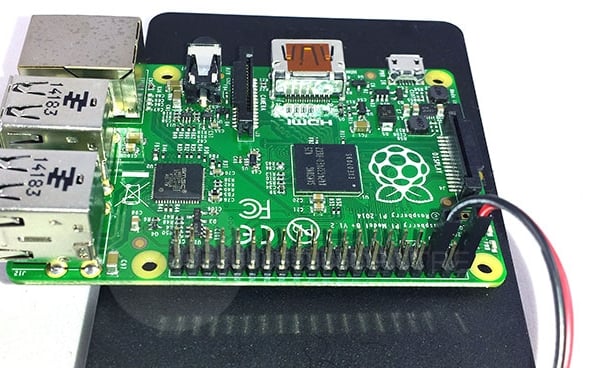
The first time I had extensively used an Arduino was during my ANU Engineering minor, and I was pleasantly surprised to find that you could easily power the board using the GPIO pins rather than a micro USB. The same feature exists on the Raspberry Pi as well.
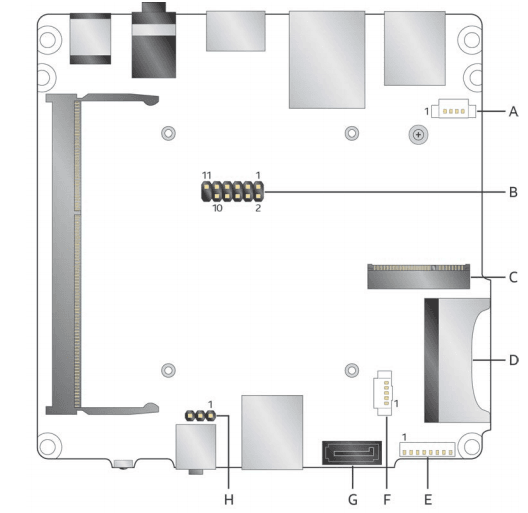
Thus, it stood to reason that the Intel NUC might have a on-board internal power header as well. After reading the technical specifications, I discovered a little 4 pin auxiliary power connector (marked A).
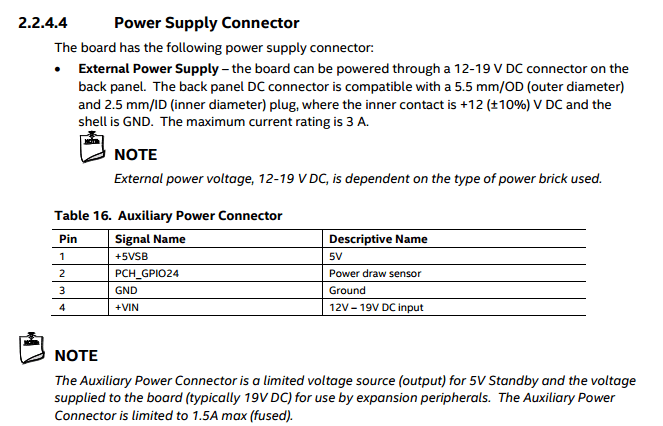
Here’s the information the technical spec sheet provides:
It appears that the inner pin is pin 1, making the outermost pin +VIN and the adjacent pin GND. It also appears that the AUX connector is 12 volts.
All the technical documentation can be found here: