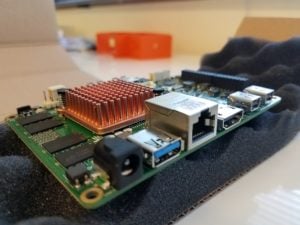
In a previous blog post, I wrote about using the official Arduino IDE with the on-board Arduino 101 on the UDOO x86 Ultra. Since our robot is headless, i.e. doesn’t run a display server, we wanted the IDE to run from the command line. While the IDE had support for using its functionality from the command line, it still, for some reason, required a display server to run. I solved this by creating a virtual X11 wrapper and running it inside that. Which was fine, but slow and pretty dodgy.
https://www.sfxrescue.com/developmentupdates/day-158-arduino-and-udoo-communication/
Since then however, an official Arduino command line tool has been released! Which means it’s time for another tutorial!
If you’re doing this over SSH, you very likely might want to allow access to hardware (like serial ports) over SSH. Otherwise, you’ll need to run arduino-cli as root to upload.
1 | $ sudo usermod -a -G dialout <username> |
First we must download arduino-cli. You used to have to download the arduino-cli binary itself, but as of 18/09/2019, the Arduino team now provide an installer script, so we can use that instead:
1 | <span class="pl-c1">$ curl -fsSL https://raw.githubusercontent.com/arduino/arduino-cli/master/install.sh | sh</span> |
This will install the binary in /home/sart/Arduino/bin
Then we want to add it to our PATH so we can run it anywhere:
1 | $ export PATH="$PATH:/home/sart/Arduino/bin" |
I also had to make sure the ~/.arduino15 directory was owned by my user, or running arduino-cli would give a Permission Denied error.
1 | $ sudo chown <username>:<username> ~/.arduino15 -R |
The first thing we must do it update the index:
1 | $ arduino-cli core update-index |
Then we want to install support for the Intel Curie / 101 board. We can do this with the board manager:
1 | $ arduino-cli core install Intel:arc32 |
The arduino-cli program is easy to use. To install libraries, which we need to do for any sensor we use, we can just do this:
1 | $ arduino-cli lib install "Adafruit_VL53L0X" "Adafruit AMG88xx Library" "Adafruit MLX90614 Library" "Adafruit SGP30 Sensor" |
This installs the Adafruit libraries for most of the sensors we use. You can also use arduino-cli lib search to search for libraries.
In case you’ve never used the Arduino before. You’ll likely need to do the following to fix an issue where uploads won’t work. See here for more details.
1 2 | $ chmod +x ~/.arduino15/packages/Intel/hardware/arc32/2.0.4/scripts/create_dfu_udev_rule $ sudo ~/.arduino15/packages/Intel/hardware/arc32/2.0.4/scripts/create_dfu_udev_rule |
To compile a sketch, move to the sketch directory and use:
1 | $ arduino-cli compile -b Intel:arc32:arduino_101 |
Finally to upload a sketch, you should be able to run:
1 | $ arduino-cli upload -b Intel:arc32:arduino_101 -p /dev/serial/by-id/usb-UDOO_UDOO_X86__K73504309-if00 |
That’s all there is to it. This is naturally much quicker than the old method and should be easier to debug, not to mention much easier to set up.
This post was updated on 18/09/2019 since the Arduino team changed the way you install the program. Plus I added a bit more useful stuff.

